| "PLAYING THE FLUTE" page 1. |
Introduction
The basic technique for learning to play the flute is relatively easy, however, essentially there is one difficult part to the whole process; that of producing a smooth and full sound from the instrument. The method given here has proved itself in the pastand it is true to say that, once this particular aspect has been successfully overcome, then almost everything else falls into place reasonably simply.
No one, who intends learning to play the flute, should imagine that the whole thing will be mastered in a matter of weeks. Learning to play the instrument is fairly easy: mastering it takes a long time.
Before actually beginning to blow the flute, it is important to be comfortable and relaxed. Whether sitting or standing. the posture for the upper body and arms is the same. The player should be in an upright and comfortable position (not rigid) and should hold the shoulders back, without straining. The arms should be held with the elbows away from the body and should not allow the upper arms to rest on the ribs.

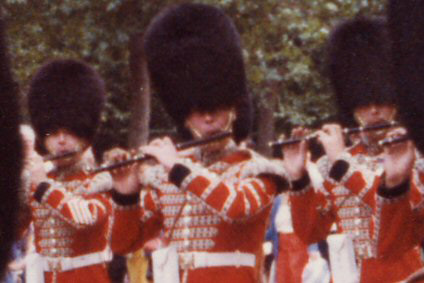
More marches
will be on line soon.
will be on line soon.
FLUTE TECHNIQUE
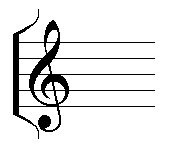

Positioning the Flute for Playing
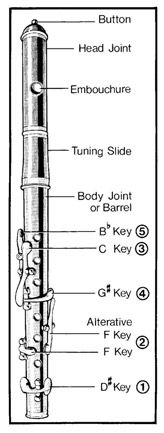
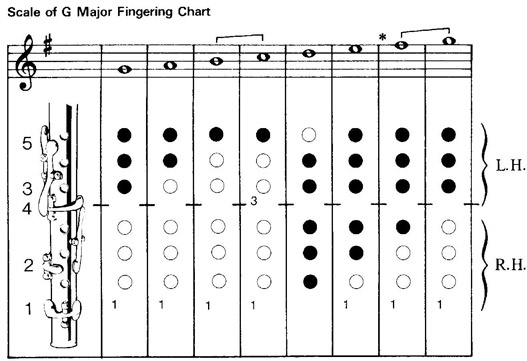
When positioning the fingers for playing, the left hand should be turned so that the fingers point back towards the player. The first three fingers cover the upper holes. The little finger of the left hand operates the (No 5) B flat key. The right hand has the fingers pointing away from the player. The first three fingers cover the lower three finger holes, the little finger operates the -(No. 1) D sharp key. The third finger operates both the lowest finger hole and also the (No 2) F natural key. The forefinger operates both the finger hole and the (No. 3) C natural key.
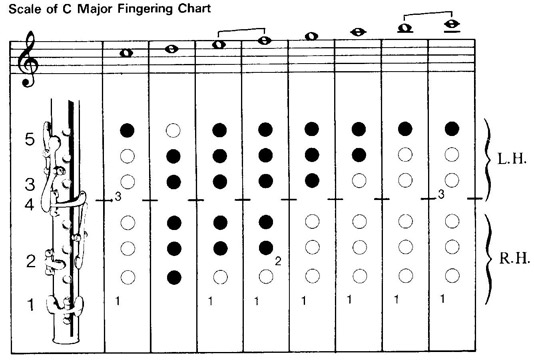
These examples show that scales are ladder-like progression of eight sounds ascending or decending in tones and semi-tones. The smallest distance or interval between two sounds is a semi-tone fall between the 3rd and 4th and 7th and 8th degrees of the scale this never varies - the semi-tones are thus TI all the other intervals are tones.
A scale may be started on any note but in order to maintain the position of the semi-tones in the scale structure of, say G major, a sharp has to be used. This raises the note affected by one semi-tone and is shown in the key signature directly after the clef. In this case the note made sharp is F (sharp), marked with an asterisk, and therefore - in G major all Fs are automatically played sharp.
A scale may be started on any note but in order to maintain the position of the semi-tones in the scale structure of, say G major, a sharp has to be used. This raises the note affected by one semi-tone and is shown in the key signature directly after the clef. In this case the note made sharp is F (sharp), marked with an asterisk, and therefore - in G major all Fs are automatically played sharp.
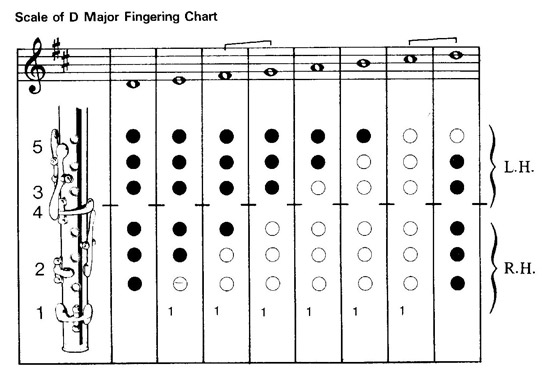
This scale has many notes that have been learned in previous scales. There are two sharps, namely F sharp and C sharp. These are indicated by sharp signs being written on the stave on the F line and in the C space. However, look carefully at the third note in from the left, an F! this one falls into the space on the stave but regardless, is still played as an F sharp. Remember, all Fs and all Cs in D major are played sharp no matter where they are written on the stave.
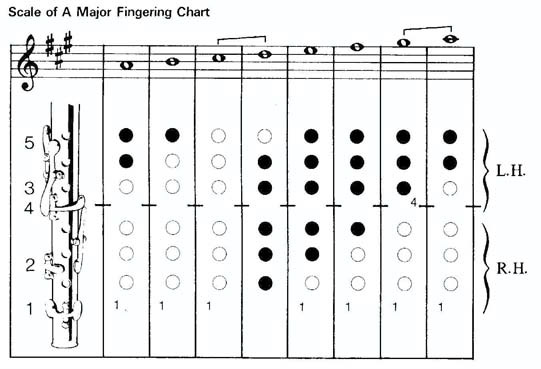
There is one new fingering to be learned in his scale; that of G sharp indicated as before by a sharp sign written at the beginning of the stave. From the arrangement of the sharp signs, it can be seen that there is a specific pattern to which they should always conform. The written sharps (or flats) at the beginning of the stave are called key signatures and indicate to the player, at a glance, the key in which the music is written.
There is one new fingering to be learned in his scale; that of G sharp indicated as before by a sharp sign written at the beginning of the stave. From the arrangement of the sharp signs, it can be seen that there is a specific pattern to which they should always conform. The written sharps (or flats) at the beginning of the stave are called key signatures and indicate to the player, at a glance, the key in which the music is written.
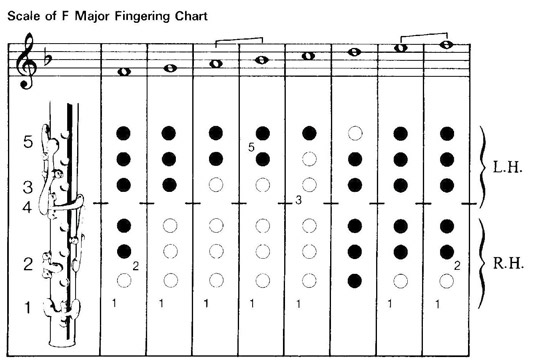
The scale of F major has one flat namely B flat which is marked with the flat sign written on the B line. This has the effect of lowering the affected note by one semi-tone.
|
|
|
|


Flute Exercises.
Web Master Peter McCarthy BEM